First, start by tracing circles onto the wrong side of a man-made fabric, like polyester. (You want fake stuff, not cotton or other natural materials because later, the fabric gets melted.) I like to use 4 different-sized circles for each flower, and as I was making 2 flowers, I traced 4 circles of each size. That would be 2 circles of each size per flower.
Cut out circles.
Next is the fun step of burning the edges. All you want to do is lightly melt them, so don't hold them in the fire too long. It's best to use some sort of fire from oil, like one of those butane lighters, but that hurts my hand after a while, so I used a candle. The problem with candles is that they can leave a smoky tinge on your fabric if you're not super quick about it. Fair warning.
 |
| The circles curl up a bit. That's a good thing. It adds to the overall look once assembled. |
Once that's all stitched together, I then sew a bead onto the center.
 |
| See? It looks like a flower now! |
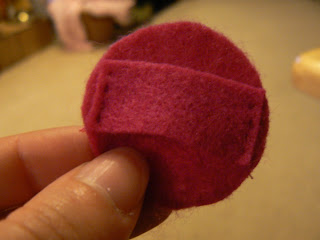
The reason for all that is because I want the option of slipping a hair clip into it or a pin. An added bonus is that the felt adds a little something that helps the clip to stay in fine hair. (Very important to fine-haired me!) For gift-giving, I slip both a pin and a hair clip into the back so the recipient can decide for herself how she wants to wear her flowers.
All finished and placed in a box for giving as a gift.
These turn out very pretty and impressive-looking for very little money. I received so many compliments on the ones I made for Easter Sunday, and my niece really liked her pink ones. Now I just need to make some pink ones for me.


2 comments:
These are super cute, AM! I may have to give them a try.
These are great, girl!
Post a Comment