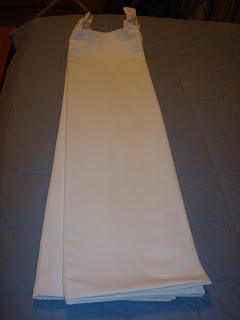
Then I happened to find some white curtains in Target one day on clearance. Two panels to a package for $11.88. I bought 2 packages, seeing as $24, or $6 per panel, was as good a deal as I was going to find. But man, were they boring.
All along I figured I'd be adding ribbon to them, but that involves that darned sewing thing again. Besides, enough ribbon to go around 4 curtain panels was going to get pretty pricey. I finally decided to go with fabric paint and foam stamps.
First, I washed and ironed the curtains. I folded them in quarters to make faint creases that could help me with my spacing.

I bought a cheap plastic drop cloth to use for this project. That was approximately $2. I covered my workspace, aka my dining table, with that. (Funny story: My husband mildly grumbled when I threw that into the cart at Home Depot a few weeks ago because we have drop cloths--lots of them. I reminded him that those were used to cover all our furniture and cabinets back when they jackhammered through our floors to fix the leaks under our house. They're filthy with dust, and there was no way I was using those with my white curtains!)

My supplies included 2 bottles of fabric paint (approximately $10 total), 2 foam stamps ($3 total), foam brushes (previously used on another project, but I think they were bought on sale 2/$1), and my paint holder is actually half of a Jello Jigglers egg mold. I got that free at a Taste of Home thing I attended years ago. As we have no children, and neither of us is interested in eating jello with our hands, I use the molds for paint.

I used the foam brushes to brush the paint onto the stamps. That kept the stamps from becoming too loaded with paint. This is one project that can't be done over if mistakes are made! I used a ruler to help a bit with spacing. I was meticulous on the first curtain panel, then I loosened up a bit on the remaining panels and mostly eyeballed it. (That's where those creases I made in the curtains after ironing came in handy.)

A finished panel:

The panels had to go somewhere to dry. I couldn't lay them out on the floor or leave one on the table because I have 2 naughty kitties who would happily walk or sit on them. I pulled out both of my drying racks and used the bathroom shower rod.


Once dry, I pulled down the old curtains, dusted all the curtain hardware, then hung the new ones. I'm very pleased with the final result!


Total cost: $40 for a personalized look.


6 comments:
Suh-weet! These are awesome!
Nice job, Anne Marie. Have a great weekend!
DIY projects are the best!! You did a great job!
really pretty!
and isn't sponge stamping fun? I just did some roses with sponge stamping and am wondering why I have not done it sooner.
Hey, if you still want "ribbons", you can tape off double-strips and paint within the two. That's what we did for the burgandy "pinstripes" in our bathroom.
They look very pretty! Nice job! (Although you could've opted for the Imperial logo! Just kidding).
Post a Comment